• Skip to main content
  • Skip to primary sidebar
  • Skip to footer
  • Facebook
  • Instagram
  • Pinterest

Sarah Labs Art Blog

Artwork, Inspiration, and Tutorials

  • Welcome!
    • My Story 🤍
    • My Portfolio
  • Shop
  • Blog
  • Art Supplies
  • Contact

in DIY, Murals · May 5, 2023

Dinosaur Mural

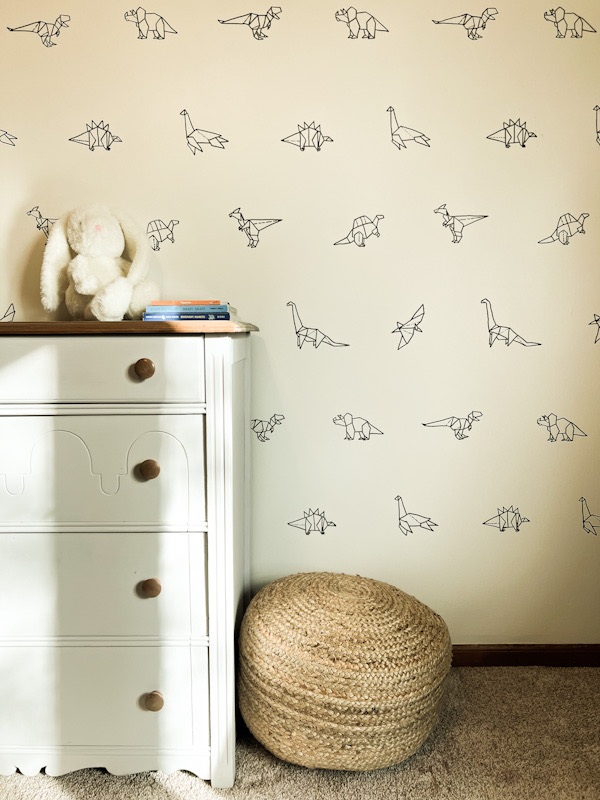
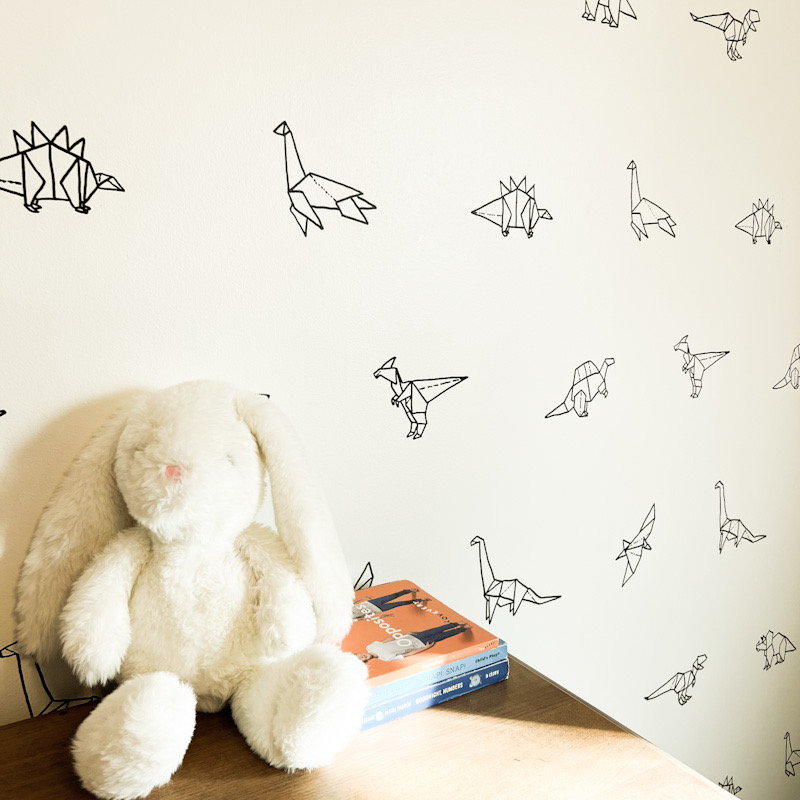
While we’re getting settled in our new city and fighting our way through mountains of cardboard, I thought I’d share a fun dinosaur mural that we painted in our old house. It’s really a really simple technique that you could apply to all sorts of designs.

This project doesn’t take much. You probably have most of these supplies at home. For $8.73 I was able to give my son’s room a fun feature wall. Now that’s a huge budget saver!!

Supplies:

If you buy through one of my affiliate links below, it won’t cost you a penny more, but I do get a tiny commission. That means you get great, vetted supplies AND the satisfaction of knowing you supported an emerging artist today. #win!

  • Photocopies of your design
  • Chalk
  • Pencil
  • Tape measure
  • Water-based paint markers – like this or these
  • Painter’s tape
  • Level

Planning…

First, you’ll want to choose your design. I went with origami dinosaurs. I found a really cute wallpaper that I loved, but with a new baby on the way I simply could not afford it. So, we used it as inspiration and created a minimalistic dinosaur mural.

Lay out your design

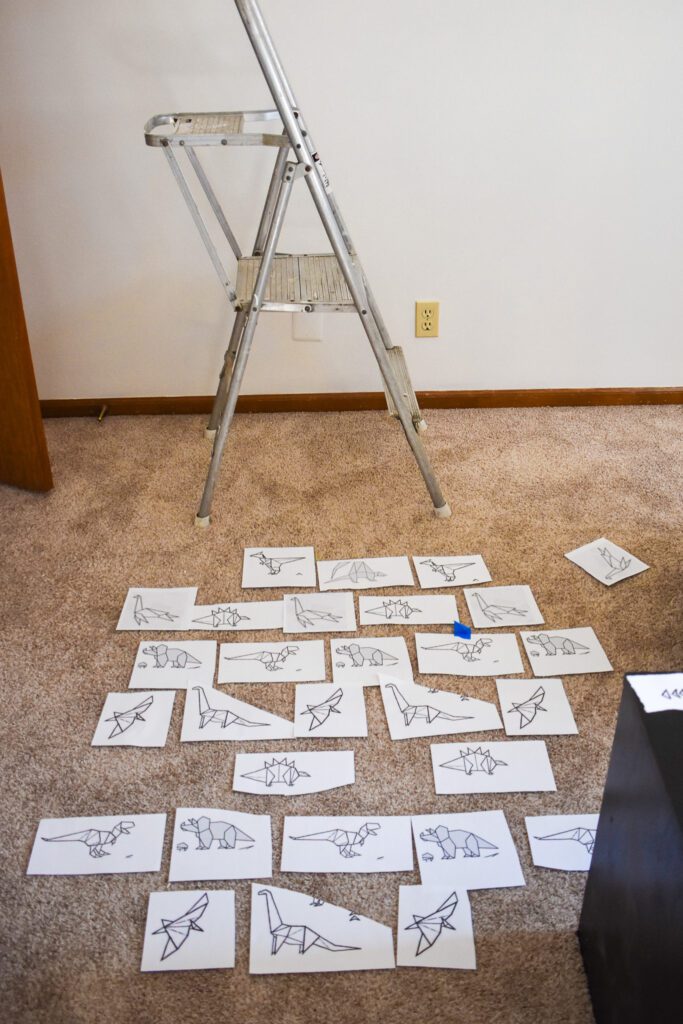
I made several photocopies of our dinosaur designs. How many you need will truly depend on what you’re choosing to do. Think about the size of the wall and the size of the design. My dinosaurs were about 3×6 inches, and I had 6 copies of each dinosaur. That worked well for us and made it easier to lay them out and choose a pattern. Also, it meant there would be less climbing up and down the ladder, and at 8 months pregnant, that was a win. (I should note, that I was being very safe and had a lot of help from my friend Emily for both the ladder and this project!! She’s a rockstar. Love you, Em!)

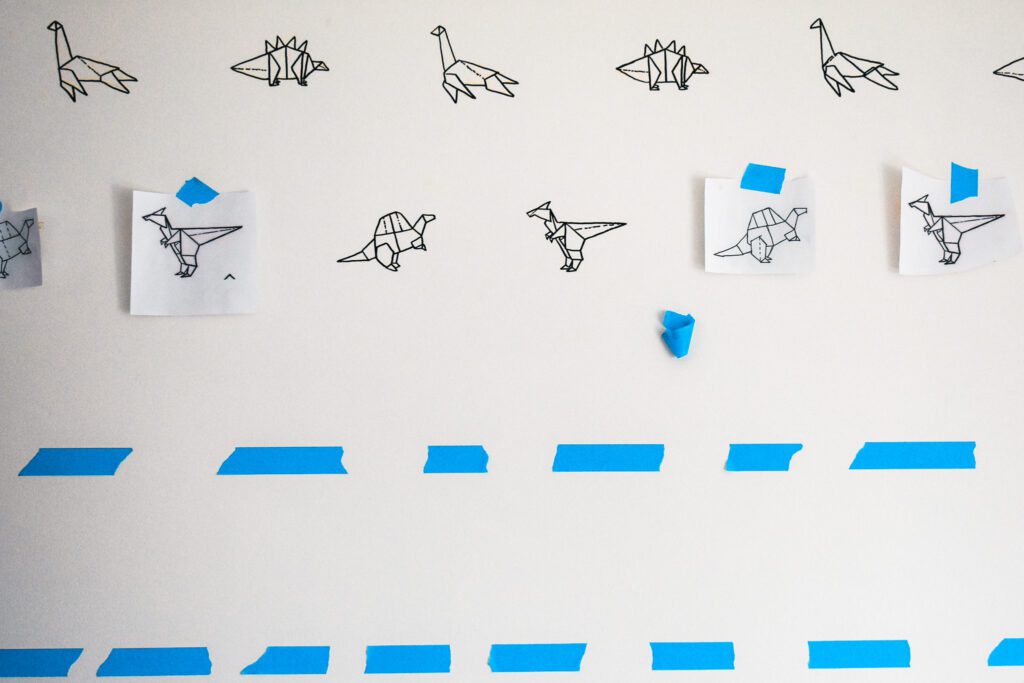
We worked on the wall from top to bottom. After measuring the wall we decided our first line needed to start 10 inches down from the top. We used the center of the dinosaurs’ bodies to align them on the line. Then each row thereafter was 10 apart from the center of the dinosaurs.

Painters tape worked well to mark where the lines would go without having to add any pencil markings to the wall.

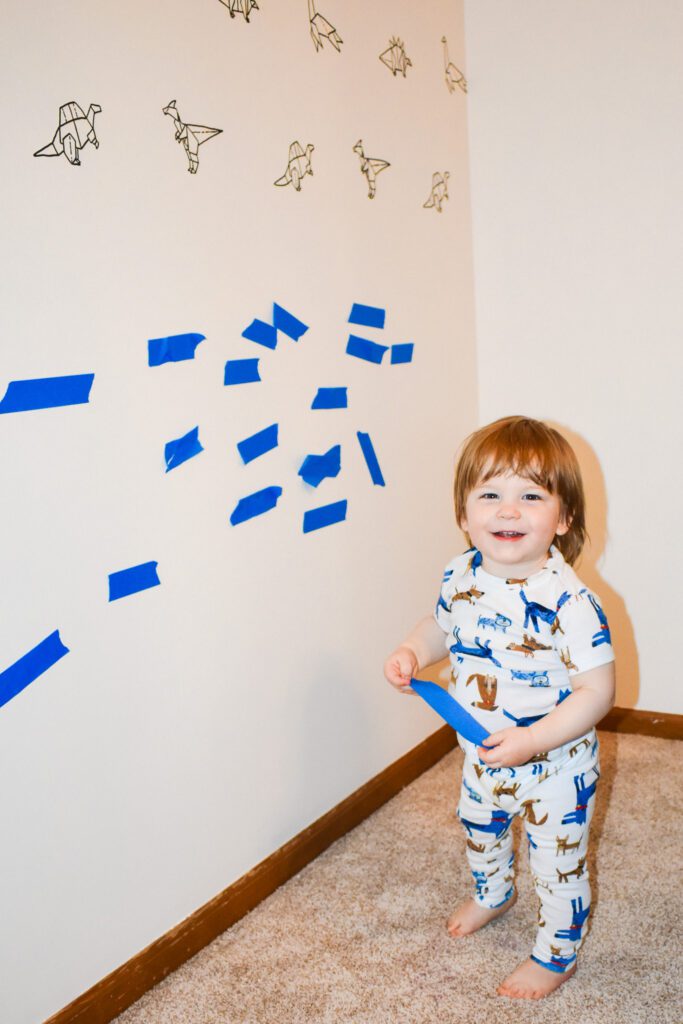
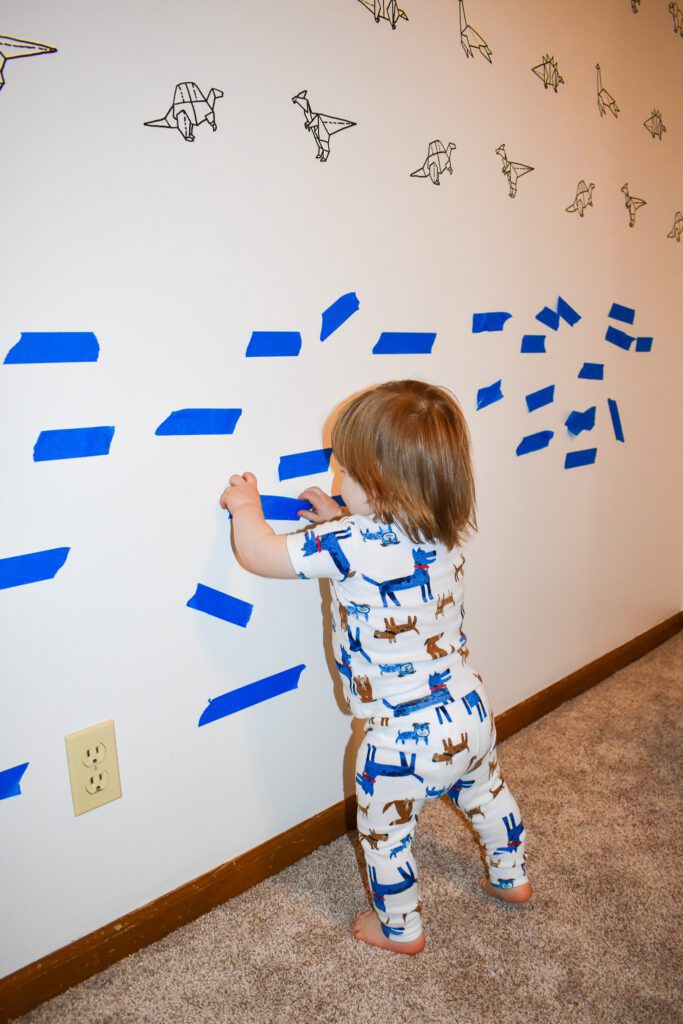
Just be careful that your “helper” doesn’t start making any decisions without you. Haha!

Adding the Dinosaurs to the wall…

We’re going to use a simple transfer technique to create the mural.

Flip the copies of your design over and hold them up to a window. Trace the shape of your design and make sure it is well coated well in chalk.

This is what the chalk side of our dinos looked like. Messy! 🙂

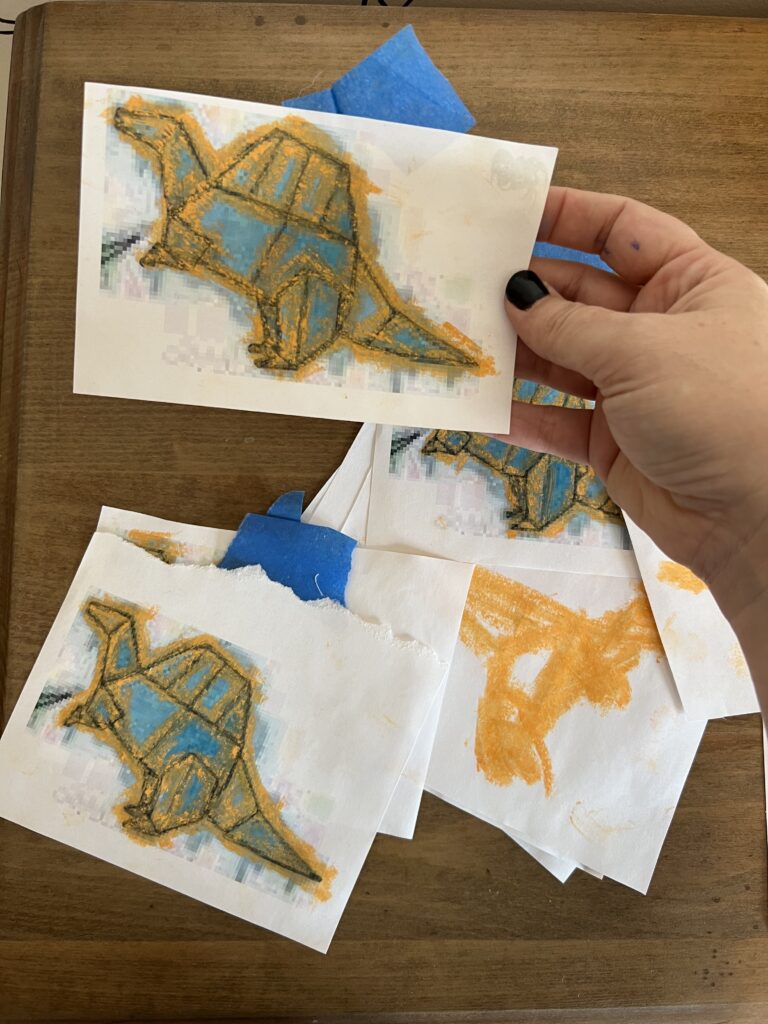
Gently now! Place your templates in the desired location with the chalk side touching the wall, and tape them down in a few spots with painter’s tape. Do not slide these templates around…you’ll make a mess and the tracing won’t work as well for you.

You’ll trace your design again. This time with a pencil.

Carefully peel away the paper after your template has been traced. You’ll use it again, so just set it to the side. Woo hoo!! Now you should see a chalk outline of your design on the wall!

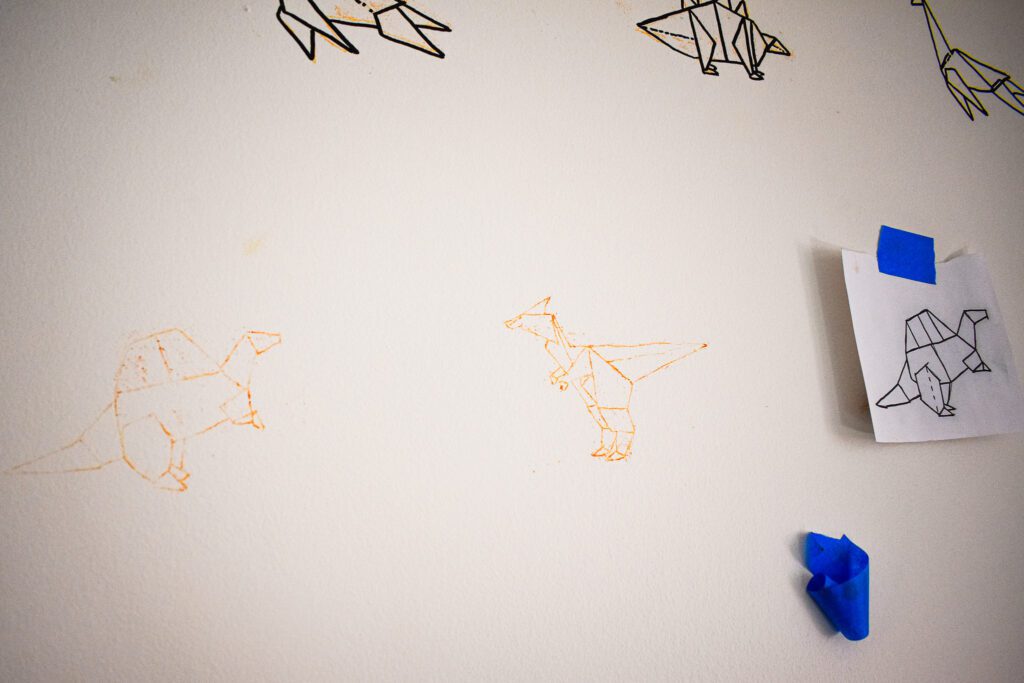
The next step is to trace over the chalk outline with a paint marker. You want to make sure you use a water-based paint marker and NOT an oil-based paint marker.

There are a couple of big differences between the two.

  1. Dry time. Water-based markers will dry more quickly.
  2. The biggest reason though, is you want your design to act like the wall paint you’re adding it onto. If you were to use an oil-based marker and then try to cover it with a new coat of wall paint, later when you’re ready for a change, it would start doing funky things like repelling the paint or peeling. So, it’s best to just use a water-based paint marker! It’s easy to tell the difference, it should be right there on the packaging.
NOTE:

We used three markers for the whole project and they all had paint leftover in them. The reason we went through three was, the tip on one of the markers started to separate and quit making clean lines. You may be able to get by with just one marker for your entire project, but I would recommend having a spare just in case the tip starts to split.

Last step! After everything has dried wipe up any remaining chalk with a damp paper towel.
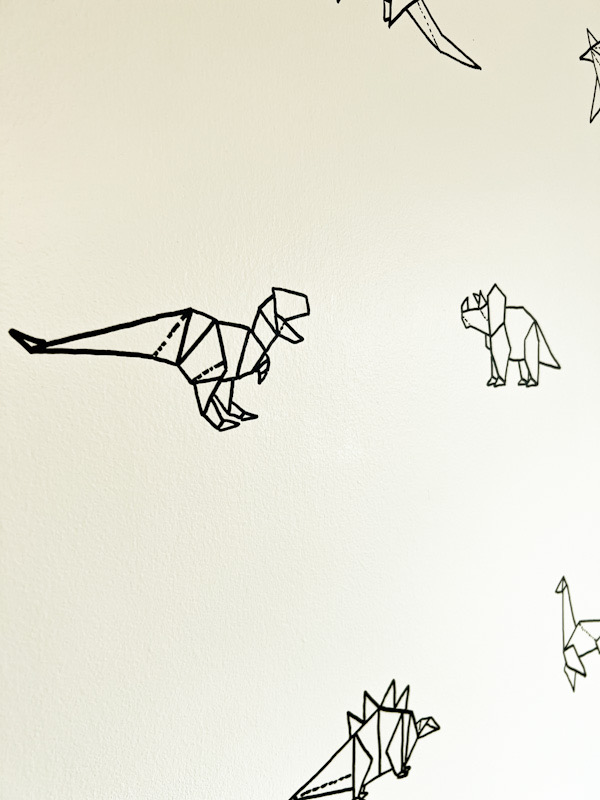
That’s it!

I hope you enjoyed this minimalistic dinosaur mural. It’s tedious but very easy, doable, and totally worth it.

Be sure to share your mural projects @SarahLabsArt on Instagram or Facebook. I can’t wait to see what you come up with! 🙂

Previous Post: « Fiesta Shoebox Floats
Next Post: Playroom Makeover – Part 1 »

Reader Interactions

Leave a Reply Cancel reply

Your email address will not be published. Required fields are marked *

Primary Sidebar

Hey there!

Hey there!

I'm Sarah Labs. I'm a mixed-media artist, wife and proud momma to three energetic boys.

Welcome to my blog! This is where I love to pull back the curtain on my life. I talk about my creative process, share painting tips, inspiration and simple ideas to help you sprinkle more creativity in your daily life - including making art with your kids.

  • Facebook
  • Instagram
  • Pinterest

Subscribe

Join the mailing list. Subscribe today!

Missed Something?

Footer

Photo Slider

I Love You, Kid
I Choose Positivity
  • Facebook
  • Instagram
  • Pinterest

burritoandshug

✎ Surface Pattern Designer
➺ Hand-drawn art for happy homes
➺ Retro, quirky + nature-loving vibes
💌 Join my list for early peeks + pattern drops

After picking blueberries and making syrup, butter After picking blueberries and making syrup, butter, and snacks galore… I still had a smidge of purée left. So naturally, I grabbed a brush. 💜

Painting with blueberries is messy, grainy, hard to control—and absolutely worth it for that dreamy purple hue. 🫐🎨

#blueberryart #makersgottamake #burritoandshug
Let the good vibes grow 🌼☀️ Just a little s Let the good vibes grow 🌼☀️
Just a little sketchbook daydream about painting the fun side of the house—aka the wall behind our pool. Summer feels like the perfect time to be playful, bold, and a little bit paint-splattered.
Say hello to the Roll With It Collection!🌈✨ A Say hello to the Roll With It Collection!🌈✨
A retro-inspired pattern party filled with flower power, pastel rainbows, and rollerskating joy. 🎶☁️🌼 Whether it's paper napkins, wallpaper, or art prints, this one's designed to spark smiles and keep the good vibes gliding.

This collection is available for licensing — DM me or visit burritoandshug.com to see more!
Say hello to Roller Rink Stripes — the blender f Say hello to Roller Rink Stripes — the blender from my Roll With It collection that brings all the retro charm with just the right amount of wobble. 💕🎨

This one was inspired by old-school skating rink walls, rainbow knee socks, and that magical moment when the lights dim and the disco ball starts to spin.
The colors? Pulled straight from the rest of the collection — so it mixes, matches, and makes everything feel like one big party on wheels.

Because even your background players deserve a moment to shine. ✨
Roll With It — because life’s gonna throw you Roll With It — because life’s gonna throw you curveballs… but that doesn’t mean you can’t lace up, throw on something cute, and skate straight through it. 💅🛼✨

This print is part of my Roll With It collection — a love letter to roller rinks, retro vibes, and the magic of moving forward (even if you wobble a little along the way).

Wear it, hang it, gift it — let it remind you that you’re allowed to fall and still look fabulous doing it.
Meet Retro Daisies — a playful coordinate from m Meet Retro Daisies — a playful coordinate from my Roll With It collection that’s here to bring the funk and florals. 🌼💃

She’s got just the right amount of sass, a whole lot of 70s charm, and looks like she’s ready to boogie straight onto your favorite throw pillow, notebook, or statement scrunchie. 🎶

Bright, bold, and not afraid to mix it up — just like the rest of the Roll With It crew.
Which color daisy is your favorite?
Meet Rainbow Rollers — the hero print from my Ro Meet Rainbow Rollers — the hero print from my Roll With It collection and an all-out celebration of sunshine, skates, and good vibes. ☀️🛼💕

This design is for the ones who:
🎶 Chase rainbows
🛼 Dance like no one’s watching
🍒 Collect fruit stickers and roller rink tokens like treasure
💜 And believe every outfit is better with a pop of color (or ten)

It’s retro, it’s radiant, and it’s ready to roll into your day like a disco ball on wheels.
Are you lacing up?
Butterflies? Blooming florals? A splash of gingham Butterflies? Blooming florals? A splash of gingham for good measure?

Welcome to the Butterfly Garden Collection — my latest pattern party inspired by nature's boldest show-offs. 🦋🌸

✨ Say hello to:
– Wildflower Picnic: a gingham daydream
– Golden Hour Blooms: drenched in summer sunshine
– Flutter + Bloom: a floral moment with main character energy
– Plus a bonus art print that brings the whole garden inside!

Swipe through to see these designs in action — from paper napkins to mugs to a wallpaper kitchen I wish I lived in.

This collection is available for licensing! 🌼 DM me or visit burritoandshug.com to bring these blooms to your brand.
Follow on Instagram
  • Welcome!
  • Shop
  • Contact

Copyright © 2025 · Sarah Labs Art Blog · Design by Studio Mommy